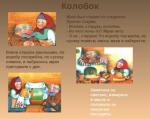
Presentations on the blockade of Leningrad, download by class hour Presentation on the menu of the blockade of Leningrad
Siege days Slides: 26 Words: 1530 Sounds: 0 Effects: 0 Light the fire…. On September 8, 1941, the blockade of Leningrad began.
Children prefer to create such crafts that they can later play with. The main figures of the child's games are animals and people.
Parents often have questions about how to mold a person from plasticine, how to teach a child this?
It seems to be quite difficult. But this is only at first glance!
We offer you several options for sculpting a person from plasticine, thanks to which you can teach your child. The main thing is to keep the proportions!
The first step is to prepare the plasticine. There are several types of it:
plasticine of medium hardness(when heated, it becomes soft and supple, but keeps its shape well, therefore it is suitable for children's crafts);
soft plasticine(Ideal for kids, it is easy to sculpt sausages, snakes and koloboks from it);
sculptural(designed for wireframe modeling, suitable for older children);
ball(consists of foam balls, it does not stick to surfaces and does not get your hands dirty).
The young sculptor will also need a plasticine knife, toothpicks, a bowl of water and an equipped workplace. It will be more convenient for the baby to sculpt at a well-lit table.
The surface of the table should be covered with oilcloth, and an apron or dressing gown should be put on the child. This will minimize the chance of getting dirty.
Making a figure of a little man is aerobatics for a three-year-old. It is still difficult for a child at this age to sculpt individual parts, and then connect them together. It will be much easier for him to “pull out” a figure from a solid bar. If your baby is handling clay for the first time, you need to practice a little first. Show him how to roll balls and sausages, and then proceed to more difficult tasks.

We take a plasticine block of any color and knead it in our hands. It should lie comfortably in the child's hand so that it is comfortable to work with it. We make a cylinder-sausage from this piece.
Now let's try to define the head. To do this, lightly press the top of the bar with your fingers.
We press the thumb on the middle of the cylinder to make the chest.
Extend arms symmetrically on both sides of the body.
We squeeze the bottom of the cylinder, forming the legs.
The figure of a little man is ready! It remains to add a few details. You can make him eyes and a nose with a match. If you want, dress the little man. For example, you can make such an apron for him.

We take a piece of plasticine and roll it into a ball the size of a walnut.
We clamp the upper part of the ball, indicating the shape of the head.
With your thumb, we push a hole in the middle of the ball to about half its thickness. Be careful not to make a hole in the figurine, otherwise you will end up with a donut.
We pinch the hands of our figure in the same way as we did the head. The length of the arms should be about 5-8 cm.
Now let's try to make legs. With one hand we hold the little man, and with the thumb of the second hand we press on the middle of its lower part. Continue modeling the figure until the legs reach the optimal thickness.
To make the feet, pinch the ends of the legs with the thumb and forefinger. Be careful not to make them too thin, otherwise the little man will not be able to stand. Bend your feet so that they are in the correct position.
It remains to apply the finishing touches: we make the waist and smooth out the roughness with our fingers.
The plasticine man is ready! It remains only to give him a name and come up with a character.

If your kid already easily copes with sculpting figures from a single piece of plasticine, he can try his hand at making a little man from individual parts. It is not at all difficult to make it, even a three-year-old child can handle it.
First, let's prepare all the details. We take a block (trunk) and make a sausage out of it, which needs to be slightly flattened. Then we roll up one large ball (head), two small ones (eyes) and two very small ones (pupils of the eyes).
With a special knife for working with plasticine or a ruler, we cut the lower part of the body by about a third, we will get legs. In the same way, with the help of incisions, we make the hands of a little man. They can be bent at the elbows or left straight.
We attach two large balls to the head and flatten them slightly, we attach smaller balls to them and also press down.
We make a small hole in the upper part of the body and place the head in this place. It remains to add a few final details: a T-shirt, shorts, ears and hair. All this will endow the little man with an individual character.
Older children want everything to look as natural as possible, details are important to them. A five-year-old child can already try to make a little man with natural features. It can be made kind and cheerful or gloomy - it all depends on the imagination of the baby. To make the figure look more natural, choose the right colors. The skin should be flesh-colored, the lips should be pink or red, and the eyes should be blue, green or brown. If you do not have a suitable plasticine for the body, mix the colors in the following proportions: yellow - one part, red - two parts, white - six parts.

First we make the head. We roll the ball, using a plasticine knife, cut a hole in it for the mouth. We make a lot of small white balls and place them in the cut out hole. We have a mouth with teeth. Now we roll out two small red sausages - lips and fix them near the mouth.
We roll up a small nose and two small white circles for the eyes, attach them to the face.
Slightly flatten the balls and stick small colored circles on them. We make eyelids, slightly covering the eyes with a piece of flesh-colored plasticine.
We roll up small thin black sausages - eyebrows. We place them above the eyes. We make ears and symmetrically fasten them on the sides. The work on the head is finished, now we proceed to the torso.
We take plasticine of any color and roll two identical cylinders out of it. We've got legs. So that the little man can stand, we insert a match or a toothpick into each cylinder. We roll two ovals of brown or black color (shoes). Each of them needs to be slightly flattened on the sole.
We sculpt an oval body and two sausage hands, they should be the same color.
All parts must be connected together with toothpicks.
It remains to mold the hands: we roll up two ovals, flatten them, cut out the fingers with a knife and attach them to the hands.
Using this technique, you can create any character from a fairy tale or cartoon. And if you mold a lot of such figures, you can arrange a real plasticine performance.

It will be interesting for the boys to mold from plasticine not a simple little man, but a real medieval knight. You can put a sword in his hands, put him on a horse and send him to battle with a plasticine dragon. Such a game will bring pleasure to any boy. It is often difficult to make a knight figurine not only for a child, but also for his parents. We suggest you use the step-by-step instructions, then you will succeed!
To work, you need to prepare plasticine, a plasticine knife, matches or toothpicks (they will be the “skeleton” of the knight).
First we will make all the details, and then we will connect. We roll up a ball (head), a cylinder (torso), two small sausages (hands), three leaves (decoration for a helmet), a shield and two more sausages (legs).
We insert toothpicks into the head, arms and legs. They form a frame, thanks to which the figure will hold.
We connect all the parts together, put a toothpick-sword in the right hand of the knight, and a shield in the left.
Our brave knight is ready to face the bloodthirsty dragon! It remains to put him on a horse and send him into battle.
And so how to sculpt a person from plasticine in stages thanks to a simple execution scheme? One of the fine arts is modeling from plasticine. Many different compositions and three-dimensional images can be recreated using plastic materials. Modeling with plasticine is rich and diverse in its capabilities and is accessible to anyone, even the smallest why. To get to know this type of fine art better, it’s enough to start with the simplest. For example, from the modeling of a man. And so let's start how to mold a person from plasticine, the scheme is simple, step by step. Let's start the simplest modeling of a human figure from plasticine. At the end, you will find a video on how to mold a person from plasticine.
We sculpt a person
 It is a pleasure and pleasure to create a figure of a person from plasticine with your own hands. Plasticine is easily kneaded by hands and does not harden without additional processing. Plasticine has an oily base, so you should not work with it on surfaces that can deteriorate due to grease. It is best to use a piece of linoleum or cardboard as a surface for modeling. If it is not possible to find a suitable surface, you can buy a special kit that contains a plasticine cutting knife, various molds for modeling and, of course, a special board. Plasticine tends to stick to the surface, so before starting work, you need to moisten the board with water.
plasticine man
So, let's start sculpting a sculpture of a man made of plasticine. To do this, we need several types of plasticine, a knife for cutting it and several toothpicks. It is desirable that, in addition to plasticine with the usual colors, there are several pieces of flesh-colored. This color of plasticine can also be obtained by mixing white, red and yellow. In this case, the proportions 6/2/1 must be observed.
We sculpt a man's head from plasticine
We begin to sculpt the head of a person from plasticine with our own hands. In order to mold the head, you need to make an oval and cut out the mouth with a knife. After that, the little man needs to make a smile by inserting teeth made of white plasticine. Let's move on to more detailed details of how to mold a person's face from plasticine.
We sculpt teeth
After the little man has teeth, you need to make lips. To do this, roll out a thin strip and place it around the mouth. From a small piece of red plasticine you need to make a tongue.
How to blind the eyes of a human figure
The most interesting element among others are the human eyes. To do this, you need to blind two white balls and place them on the head above the nose. Having done this, you can move on to sculpting the pupils and eyelids. You also need to remember to make eyebrows for the little man. By changing the shape of the mouth, eyes and eyebrows, we can show different variations of the facial expressions of our composition.
ear molding
Plasticine human ears can be molded in any size, as long as they are symmetrical. Attach them to the sides at the level of the nose, tucking them in a little.
hairstyle for a human figure
I do a hairstyle for a person from plasticine with my own hands, you can show your imagination. You can leave a bald head or depict a variety of hats, for example, make a cap or a fishing hat.
The head of a person from plasticine that you made yourself is completely ready. You can move on to sculpting everything else. First, let's make the legs (lower part). We sculpt shoes and insert one or two toothpicks into them for strength. After we close the toothpicks with pants, which can be made from plasticine of any color. Then, we put the torso on the remaining pins.
We make hands from plasticine to a little man
In order to make hands, you need to roll out two symmetrical sausages and attach them to the torso, where they actually should be located. The most difficult task when creating hands is sculpting fingers. You need to make a blank in the form of an oval, and carefully cut them out with a knife. After that, the fingers are given an aesthetic appearance.
We fasten the head to the body of the figure
It remains to attach the head to the body of a person. To do this, insert a few toothpicks into the torso and connect them with their neck. That's all, a simple do-it-yourself plasticine man is ready. And don't forget to keep the proportions. Although creative people should not put limits!
Step by step video on how to mold a person with plasticine
Video how to make a spider-man from plasticine with your own hands
A master class on how to mold a person from plasticine in stages will interest not only children, but also adults who are fond of modeling. Such figurines can be created for playing, staging scenes, for example, from famous films or books, as well as for making cartoons.


Modeling plasticine men is based on one principle. When creating figures, it is necessary to take into account the proportions of a person: the head is 1/7 or 1/8 of the entire body, the belt divides the figure approximately in half, and the hands should reach almost to the knees. Of course, if cartoon characters are created, the proportions can be broken. In any case, a person should look harmonious and have a good basis for stability.


More realistic, anatomical figures are made from plasticine and wire. Such sculptures can be given any position: the wire plays the role of a bending frame, which is made according to the human skeleton.

Wireframe shapes are well suited for creating animation - cartoons. They are easy to bend, giving different natural positions.
To create wire parts, you can build a simple machine from a wooden block and two long nails (pins) set at the same distance from each other.

It is better to make parts of the body from thicker wire, and fasten everything together with thin, well-bending wire.


The finished frame is covered with plasticine.

You don't have to use a wireframe to create simple shapes. It is enough to correctly and proportionally connect the parts of the body.
Consider step by step how to mold a girl - a simple human figure.

What you need:
Working process:


Superhero figurines will please fans of comics, cartoons and films about people with superpowers. Such figures can be made static, as a collectible craft, as well as moving, as a toy. In order for the arms and legs to move, you can attach them to the body with toothpicks or matches.
One of the popular heroes among several generations of children is still Spiderman.

Making a spider-man figurine is not as difficult as it might seem at first glance.
To do this, you will need blocks of red, black, white and blue plasticine, as well as stacks so that the modeling process is neat, a board and napkins for hands.

How to do:


The figurine is ready!

From red and yellow plasticine, you can create a simple iron man figure.

How to do:


You can see how to make plasticine people in a selection of videos.
Instruction
Familiarize yourself with the proportions of the human body. The more accurately you want to sculpt the figure, the more important this item is for you. This can be done according to the anatomical atlas. Remember the ratio of the sizes of body parts, pay attention to which large muscles create the relief of the human body on the back, legs, arms.
Take prepared, already wet, modeling clay. Keep it a little in your hands and beat it off to get rid of the air in the mass. For clay modeling, a plinth is often needed - the base on which the figure is placed. It can be of any shape, for example, in the form of a stone on which a person sits, in the form of a relief plate, in the form of a pedestal.
Constructive molding. Model individual parts of the body, starting with the largest (torso, head, limbs). Blind the head from a rolled up ball. With the help of a stack (shaped spatula for modeling) on the head, form the eye sockets, cheekbones, nose, mouth, and then bring them to the desired accuracy and perfection. Extend the neck slightly at the bottom of the head.
Sculpt the body from an oval piece of clay. You can make a cone out of a piece of clay, or you can mold the chest, waist and pelvis lines in more detail. In the torso, with the help of a special, round at the end, stack, make indentations for the arms and legs.
Sculpt arms and legs from rolled "". They can not be detailed, but only the palms and fingers can be distinguished. You can even get very detailed by applying clay in the right places, creating muscles (relief modeling). Lastly, sculpt the small details. To create them, use the methods of pulling or pinching clay, pulling out with your fingers a small part from the total piece to the desired size.
Connect the parts as they are made. To prevent falling off of body parts during drying, it is necessary to tightly join the parts or insert them into prepared recesses and cover them with clay using a stack. It is also recommended to pre-slightly scratch the joints with a toothbrush or use small pieces of matches or toothpicks to connect the parts.
Plastic molding method. Sculpt a figure of a person from a single piece of clay, pulling out parts of the body or carving them, removing excess clay. In this case, the sculpture is molded, starting from the bottom up. This method is more complicated, as it requires a developed eye and a clear idea of the proportions of the human body. But you can combine both modeling methods, making, for example, the head and chest from a monolithic piece of clay, and the arms and legs from separate parts.
A figure of a person with a height of more than 10 cm requires a frame, otherwise it will not retain its shape. Prepare the wire frame of the desired position, fix it on the stand. The wire must be both flexible and strong. For better fastening of clay on the frame, the main wire should be wrapped in not very frequent turns of another, maybe thinner, wire. When the frame is ready, cover it with clay, giving it the desired shape with your fingers and a stack.
Elena Kostina
Master Class ""
In various programs of preschool education, the task is to sculpt human figure in motion. She may sound differently: "the formation of the ability to convey characteristic movements human, create expressive images ... the girl is dancing, the children are doing gymnastics), etc. There is a problem in the transfer of movements if each arm and each leg is attached separately (smeared). Upon attempt (and there may be several) change the position of the arms or legs, they may break off. For myself, I discovered a method that not only speeds up the creation figurines, does figurine much stronger and more stable, but also allows you to repeatedly change the position of the arms and legs, transmit various movements without fear of breaking them off. The quality of work increases, which gives children self-confidence. Children use the saved time for decorating, detailing work.
I will show this method using the example of a soldier and a boy in winter clothes.
We roll out a thick cylinder for a tunic, for legs - a long cylinder of medium thickness, a black cylinder for boots. We roll up balls for the head, hands, headdress, details. We cut the upper part of the tunic in a stack and the cylinder for boots in half.
Form two sleeves with your fingers, rounding and stretching them. Important moment: arms with a torso are obtained in one piece.

Fold the trouser top in half. This is also very important moment: it turns out the whole part of the lower body from the waist with legs. We sharpen the lower parts of the pants. We make a dimple in the lower part of the tunic.

We form "beaks" on the head and hands. We make dimples in the sleeves, collar, boots.

We collect parts - the soldier is ready.

He can march...

Do exercises…

Box.

We are preparing a thick cylinder for a jacket, a thin long one for pants, an egg for boots.

We cut the upper part of the jacket, the testicle in half lengthwise, fold the panties in half.

We make dimples in the sleeves, boots, the bottom of the jacket. We sharpen the bottom of the panties.

Assembling the boy, adding details. Now he can ski...

Sledging…

On skates.

Can push sleds...

Can throw snowballs...

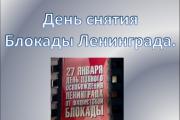
Siege days Slides: 26 Words: 1530 Sounds: 0 Effects: 0 Light the fire…. On September 8, 1941, the blockade of Leningrad began.
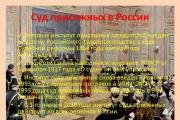
Slide 2 Jury Trial This is an institution of the judicial system, consisting of a bench of jurors selected by ...
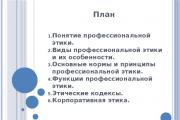
Slide 1 Professional ethics. Essence, classification, functions. Corporate ethics. Slide 2 Plan Concept ...
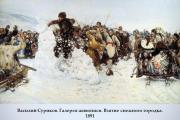
SURIKOV Vasily Ivanovich was born in 1848 in Krasnoyarsk. A strong desire to learn painting made him at first...
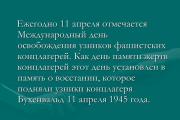
Every year on April 11, the International Day for the Liberation of Prisoners of Nazi Concentration Camps is celebrated. As a day of remembrance for the victims...
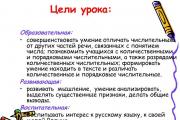
Topic: "Quantitative and ordinal numbers. Discharges in cardinal numbers." Lesson Objectives: Educational:...

To use the preview of presentations, create yourself a Google account (account) and ...

The purpose of the lesson is to get acquainted with the teachings of Christ. Lesson objectives. Educational: to acquaint children with the meaning of words ...

Slide 2 Thermal power plants THERMAL POWER PLANT (TPP), a power plant that generates electrical ...
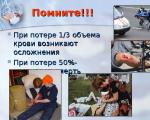
MOU secondary school No. 4 Presentation on life safety on the topic: “Bleeding. First aid for bleeding "Teachers of life safety ...
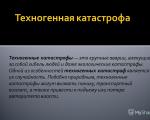
Man-made disasters are major accidents that lead to the death of people and even environmental disasters.
To use the preview of presentations, create yourself a Google account (account) and ...
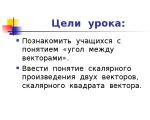
MOU secondary school No. 256 Fokino To introduce students to the concept of "angle between vectors". Introduce the concept of a scalar ...
What is a mosaic? Mosaic (from lat. (opus) musivum a work dedicated to the muses) arts and crafts and...
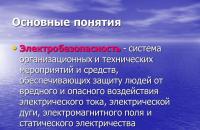
Basic concepts Electrical safety is a system of organizational and technical measures and means, ...
1.Architecture. From the 11th century extensive temple construction began in Western Europe. The church that grew rich...