Income from sales calculation formula
In general terms, profit is understood as the difference between the funds received from sales and the costs of the enterprise...
Modern digital cameras significantly facilitated the photographer’s work, making it more efficient, speeding up the process of obtaining the finished photograph hundreds of times. In fact, we immediately see an almost finished photo on the camera display. Another question is whether the quality of the photographs has increased as a result... But that’s not what we’re talking about now.
One of the ways to preliminary assess the quality of a photograph is to analyze the histogram on the camera screen.
Histogram is a graph of the brightness distribution of image pixels. The camera can display both an overall histogram of the composite RGB channel and histograms of the individual red, green, and blue channels. The horizontal axis is the pixel brightness values, from black to white, through intermediate gradations (for color channels, respectively, from black to the most saturated color). The vertical axis is the number of pixels corresponding to a certain brightness, expressed in relative units.
Let's look at examples of what information can be obtained from analyzing the histogram, and how you need to adjust the camera settings in order to get best quality images. Indeed, in many articles there is the phrase “follow the histogram” or “focus on the histogram.” Let's figure out what exactly you need to keep an eye on and what to do with these “guidances” later.


If the scene you're shooting has a fairly wide range of brightness, the histogram of a normally exposed photo will look something like the image above. The histogram occupies the entire tonal range, while on the right, in the area of highlights, it should not be cut off (a small area should remain). Although, in some cases, the histogram may be cut off. This happens if there are very bright light sources or glare in the frame. If the photo is exposed normally, no adjustments need to be made to the settings.
Important note: on the camera screen you see an image specially created for viewing, the so-called built-in thumbnail. It has already been processed by the camera processor, that is, the contrast has been raised, the gamma has been adjusted, etc. So if you're shooting inRAW, then you have some margin in the highlights, that is, you can allow a little clipping (trimming the histogram) in the light areas. When you subsequently reduce the exposure in the converter, the information will be restored, and the noise in the image will decrease slightly. This method of shooting is calledETTR (ExposureToTheRight).


Otherwise, this photo is called underexposed or underexposed.
In this case, the photo visually looks darker than it actually should be. In this case, the histogram is cut off on the left, in the shadow area, and an extended area is formed in the highlight area. If the shooting is done in JPEG format, then during the subsequent post-processing of such a picture we create a lot of problems for ourselves. These are lost details in the shadows, increased noise levels when the image is brightened, and the need for color correction. When shooting in RAW format the situation is not so tragic, but the image quality will still be lower than if we used a picture with normal exposure. Noise in the image will inevitably increase, therefore, it will be necessary to deal with it. And the fight against noise is always a compromise between noise and small details. There is no program yet that would perfectly remove noise while leaving the same detail as a photo with a lower ISO and normal exposure.
To get a normally exposed photo if your test photo is underexposed, you should do one or two of the following:


Otherwise, this photo is called overexposed or overexposed.
In this case, the photo visually looks lighter than it really should be. In this case, the histogram is cut off on the right, in the area of highlights, and in the area of shadows, on the left, an extended area is formed. If the shooting is done in JPEG format, then the lost information cannot be restored, that is, details in bright areas are lost forever. Sometimes overexposure is used as an artistic technique. If you shoot in RAW format, then it forgives small errors in exposure (within 1-2 stops, depending on the camera model), but this is not a reason to continue making mistakes when shooting. In the converter, such imaginary losses of information are easily restored, and the image quality is somewhat improved (see above about the ETTR method).
To get a normally exposed photo if your test shot is overexposed, you should do one or two of the following:
If you're shooting on a bright sunny day with a fast lens wide open, your camera's shutter speed and ISO may not be sufficient to capture a properly exposed photo. In this case, it makes sense to use a neutral gray filter that weakens the light flux.
Modern digital cameras have made the photographer's work much easier, making it more efficient, speeding up the process of obtaining a finished photograph hundreds of times. In fact, we immediately see an almost finished photo on the camera display. Another question is whether the quality of the photographs has increased as a result... But that’s not what we’re talking about now.
One of the ways to preliminary assess the quality of a photograph is to analyze the histogram on the camera screen.
Histogram is a graph of the brightness distribution of image pixels. The camera can display both an overall histogram of the composite RGB channel and histograms of the individual red, green, and blue channels. The horizontal axis is the pixel brightness values, from black to white, through intermediate gradations (for color channels, respectively, from black to the most saturated color). The vertical axis is the number of pixels corresponding to a certain brightness, expressed in relative units.
Let's look at examples of what information can be obtained from histogram analysis, and how you need to adjust your camera settings to get the best image quality. Indeed, in many articles there is the phrase “follow the histogram” or “focus on the histogram.” Let's figure out what exactly you need to keep an eye on and what to do with these “guidances” later.
If the scene you're shooting has a fairly wide range of brightness, the histogram of a normally exposed photo will look something like the image above. The histogram occupies the entire tonal range, while on the right, in the area of highlights, it should not be cut off (a small area should remain). Although, in some cases, the histogram may be cut off. This happens if there are very bright light sources or glare in the frame. If the photo is exposed normally, no adjustments need to be made to the settings.
Important note: on the camera screen you see an image specially created for viewing, the so-called built-in thumbnail. It has already been processed by the camera processor, that is, the contrast has been raised, the gamma has been adjusted, etc. So if you're shooting inRAW, then you have some margin in the highlights, that is, you can allow a little clipping (trimming the histogram) in the light areas. When you subsequently reduce the exposure in the converter, the information will be restored, and the noise in the image will decrease slightly. This method of shooting is calledETTR (ExposureToTheRight).
Otherwise, this photo is called underexposed or underexposed.
In this case, the photo visually looks darker than it actually should be. In this case, the histogram is cut off on the left, in the shadow area, and an extended area is formed in the highlight area. If the shooting is done in JPEG format, then during the subsequent post-processing of such a picture we create a lot of problems for ourselves. These are lost details in the shadows, increased noise levels when the image is brightened, and the need for color correction. When shooting in RAW format the situation is not so tragic, but the image quality will still be lower than if we used a picture with normal exposure. Noise in the image will inevitably increase, therefore, it will be necessary to deal with it. And the fight against noise is always a compromise between noise and small details. There is no program yet that would perfectly remove noise while leaving the same detail as a photo with a lower ISO and normal exposure.
To get a normally exposed photo if your test photo is underexposed, you should do one or two of the following:
Otherwise, this photo is called overexposed or overexposed.
In this case, the photo visually looks lighter than it really should be. In this case, the histogram is cut off on the right, in the area of highlights, and in the area of shadows, on the left, an extended area is formed. If the shooting is done in JPEG format, then the lost information cannot be restored, that is, details in bright areas are lost forever. Sometimes overexposure is used as an artistic technique. If you shoot in RAW format, then it forgives small errors in exposure (within 1-2 stops, depending on the camera model), but this is not a reason to continue making mistakes when shooting. In the converter, such imaginary losses of information are easily restored, and the image quality is somewhat improved (see above about the ETTR method).
To get a normally exposed photo if your test shot is overexposed, you should do one or two of the following:
If you're shooting on a bright sunny day with a fast lens wide open, your camera's shutter speed and ISO may not be sufficient to capture a properly exposed photo. In this case, it makes sense to use a neutral gray filter that weakens the light flux.
Availability digital camera The liquid crystal screen has made the life of the modern photographer much easier. The ability to immediately look at the captured frame and, if necessary, make a double is one of the most convenient features of digital. Unfortunately, the screen does not allow you to correctly assess the quality of the resulting image. A more precise tool for controlling the exposure of a photo is the histogram, which is available in most digital cameras.
A histogram is a graph of the distribution of tones in an image. The gradations of brightness are plotted horizontally: the leftmost point corresponds to black, the rightmost point corresponds to white. The number of pixels of the corresponding brightness is displayed vertically. By estimating the amount of highlights and shadows in the resulting image using the histogram, you can determine whether the exposure has been chosen correctly and make adjustments if necessary.
Let's look at specific examples how to use a histogram.
It can be seen that the image has no areas where details are lost. The histogram confirms this: a fairly smooth graph without sharp spikes looks like a relatively flat “hill” that stretches from the left edge of the lower axis to the right. This type of histogram indicates both the presence of bright and dark areas in the image, as well as a wide range of midtones. This photo does not require correction. What happens if we adjust the exposure settings? The histogram will move to the right or left, illustrating that either the light or dark tones are lost in the photo.

The histogram of this image also occupies the entire coordinate grid, but the graph differs from the previous one. The image has a small amount of halftones. Peaks related to dark and light areas and a dip between them characterize the image as contrasting. But, since the graph gives only a quantitative distribution of tones, and does not in any way display the distribution of pixels in the photograph, it is quite difficult to determine the contrast of a photo using a histogram. Of course, as in the previous case, changes in exposure will worsen the photo.

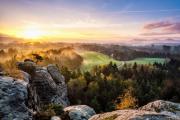
Let's look at this photo. There are no very bright or very dark areas in the image. The brightness range of such a frame is quite small, and the histogram will look like a horizontally compressed “hill” that does not significantly reach the edges of the graph field. A similar histogram is typical for low-contrast images. This type of diagram does not mean that there will be areas in the image with lost details, because the camera matrix in this case is capable of capturing the entire range of brightness. However, you should be careful about where the histogram will be located in the graph. For objects that weakly reflect light (for example, black clothes, deep shadows), the histogram should be shifted closer to the left edge of the coordinate grid, for medium-gray ones (a typical example: foliage, grass) - located in the center area and, finally, for objects with good reflectivity (for example, a white dress of a bride), the histogram should gravitate towards the right edge.
If the graph is in the wrong part of the field, exposure adjustments should be made. To shift the histogram to the left, the corrections must be negative, and to shift the histogram to the right, they must be positive. It is recommended to make the correction by changing the shutter speed, since when the lens is apertured, the depth of field in the image will change.
A variation of this type of histogram is a narrow “hill” that partially extends beyond the coordinate grid into a dark or light area. When the appropriate corrections are introduced, the histogram will take the proper form, completely fitting into the graph field.

Let's look at the histogram of this photo. The graph does not disappear at the edges of the field - it goes beyond the coordinate grid. This situation occurs when the brightness range of the object being photographed is greater than the range perceived by the camera matrix. This is the most unpleasant case. You have to choose whether to lose detail in the shadows or in the light. One way to solve this problem is to create high dynamic range (HDR) images. To do this, you need to take several pictures that differ only in exposure. Then, using a special software(The latest versions of Photoshop allow you to do this) the frames are combined into one picture that has no gaps in shadows and light.

It should be remembered that making adjustments to the exposure is always possible, but not always necessary - it depends on the artistic intent of the photographer. In addition, note that it is easier to carry out further corrections, such as contrast, in Photoshop for photographs whose histogram belongs to the first type. Of course, you can edit any photo, but the first version of the histogram will allow you to change the appearance of the graph with less effort.
Finally, it is worth noting the fact that there is no “correct” histogram. It all depends on the object being depicted. The histogram is only a tool that allows you to get rid of errors in exposure during the shooting process or reduce them to a minimum, nothing more. For example, in the photograph by Ansel Adams Moon and Half Dome, the histogram is shifted to the area of dark tones, which is not reflected in any way at the level of the photograph. The same type of histogram can be found in both a bad photograph and a brilliant one.
Publication date:
23.11.2015How to evaluate the correct exposure and color rendition of a photo? How do you know if your photo is bright enough or too dark? Of course, all this can be done by eye, just by looking at the photo. However, the eye is an imprecise instrument, and human perception is subjective. Depending on the lighting or background you're viewing the photo against, or even your mood, you may see the photo slightly differently. The display on which you are viewing the photo will also make its own adjustments: not all screens have ideal color reproduction. How can this be? How to objectively evaluate an image? An image histogram graph comes to the rescue. I'm sure you've already come across a histogram. But how to work with this graph? Let's figure it out!
The image histogram can be viewed in any more or less serious viewing or image processing program, for example, in the Nikon Capture NX-D converter “native” to Nikon cameras. The same list includes almost all other RAW converters, for example, Adobe Lightroom, Adobe Camera Raw, Phase One Capture One, DXO Optics Pro and others. Of course, the histogram can also be seen in graphic editors such as Adobe Photoshop. The ability to read a histogram will allow you to master computer processing tools such as Levels, Curves and similar ones.
Photo and its brightness histogram in Nikon Capture NX-D
But that's not all! The histogram can be viewed directly in the camera at the time of shooting. This makes the histogram a versatile tool that a photographer always has on hand. Thanks to it, the photographer can evaluate the correct exposure of the frame right during shooting.


There are histograms for each of the primary colors of the image (red, green, blue) and their total RGB histogram. There is also a brightness histogram that evaluates the brightness of the frame. It seems to me that it makes more sense to start getting acquainted with it, since it is the easiest to understand.
We look at the histogram on the camera. Modern DSLR cameras usually offer two options for viewing the histogram. Let's look at them using an example Nikon cameras D810.
The first way is to view a histogram of already captured images. To do this, just open the captured frame and select desired mode display it on the camera display. Display modes are selected using the Up button on the multi selector. One of them contains a histogram of the image, and at the same time another useful information about shooting parameters.


The second method allows you to see the histogram right at the moment of shooting. To do this you will have to use Live View mode. In it, you can display various shooting information on the screen using the info button. Including a histogram.


So what is a histogram? This is a graph of the distribution of pixels with different brightnesses in an image.
The horizontal axis of the graph displays the brightness of the tones in the image. From the darkest (black) to the lightest (white). On this axis there are bars that display the number of pixels of a given brightness. The higher the bar, the more pixels of this brightness in the photo. For example, in the example of graphics in the picture, there are most of the shades of average brightness - halftones. While there are few dark and light shades.

Because the tones are positioned differently in different frames, each image will have its own unique histogram graph. However, there are still some patterns.
To better understand how a histogram works in practice, let's first learn how to evaluate the brightness and contrast of a photo using it. First, let's look at histograms of frames with technical flaws.
Underexposed (too dark) frame. We see that the histogram graph has moved to the left side of the graph. The histogram seemed to “flow” from the graph field to the left. If the histogram graph falls on the left side, this indicates that there are a lot of dark shades in the photo, while there are absolutely no light shades (the right side of the graph is empty). It can be seen that there are a lot of black spots in the photo, devoid of details, which is why it is noticeable on the histogram graph that there is a lot of black in the photo. This indicates a loss of detail in dark areas. Instead, we see black spots.


As a rule, a frame with such a histogram is a technical defect, an exposure error. Theoretically, such a frame can be corrected when processed on a computer, especially if the frame was taken in RAW format.
If you see such a histogram on your camera while shooting, it’s time to think about whether you should brighten the frame.

Overexposed (too light) frame. The opposite situation: the histogram “crept” to the right, falling on the right border of the graph. This indicates a loss of detail in the highlight areas of the frame. Instead of details of various shades in the bright areas of the photograph, we see only white spots: what is in the sky, what is on the water. The histogram also shows this.


Usually pictures with such a histogram are a technical defect. As with the too dark frame, there was an exposure error. However, while it is possible to save dark frames when processing RAW, such overexposed pictures are practically impossible to edit. It is unlikely that you will be able to pull out details from overexposure; the photo will most likely have to be sent to the trash.


Another example of a frame with loss of detail in the highlight areas. In the photo, instead of patches of sky and the girl’s white T-shirt, there are whitish spots. On the graph they correspond to the histogram peak, “stuck” to the right border of the frame.
If on a computer such overexposure is easy to notice, then during shooting, assessing the frame by eye on the camera screen, you can easily miss it. Nevertheless, this frame cannot be saved and, roughly speaking, is also a technical defect.
It is best to avoid overexposure when shooting. To avoid them, look at the histogram of the image immediately after shooting, use the indication of overexposed zones.

Nikon D810 camera menu. Enables indication of overexposed areas.

By the way, advanced Nikon cameras (Nikon D750, Nikon D810) have a bright area exposure metering mode. It is designed to protect the frame from loss of information in bright areas.
"Normal" photo. Now that we know what histograms of images with loss of detail in light and dark areas look like, let's take a look at an example of a correctly exposed frame. His histogram looks like a hill or a boa constrictor that ate a hat. This histogram shows that the image is dominated by midtones rather than dark or light areas. At the same time, the edges of the histogram are located close to the boundaries of the graph, which means that the photo contains pixels of both the darkest shades and the lightest.
Such a frame, as a rule, looks quite contrasting and expressive, and it is excellent for processing.


Low contrast shot. Its histogram fits entirely into the graph field, while at the edges (right and left) the field is empty. This suggests that the photo does not have sufficiently dark areas or sufficiently light ones. Nevertheless, such a histogram indicates that the frame was exposed correctly and is quite suitable for subsequent processing, in which you can, among other things, increase the contrast.


When photographing, it is not always possible to achieve the desired image contrast. Much depends on lighting conditions, weather, and the selected lens. The main thing is that all the details in the image are preserved, nothing is lost outside the graph. To achieve greater contrast already when shooting, you can work with Nikon Picture Control modes, selecting, for example, Vivid (saturated). It will increase both image contrast and color saturation.

Multiple peaks in one histogram- that's quite possible option. This often happens when shooting contrasting scenes, where there are a lot of both dark and light shades, but there is little room for halftones.


In this case, the left peak fell on dark grass, and the right peak fell on the light sky.
When the digital era arrived in photography, it brought with it many benefits for photographers: creating a huge number of photos without increasing the cost as is the case with film. We can see the shot taken immediately after shooting, we can change the ISO after each shot, in film photography we had to change the film for this. But one of the most important advantages of digital photography is something that scares many beginning photographers at first: histogram.
But there's no reason to avoid it - the histogram is actually quite easy to use, once you understand how it works. Histogram is simply a graphical representation of the tonal range of your photo to help you judge exposure.
In the era of film photography, we had to wait until we developed the film to know for sure whether we had taken a good photo or not. Now, using a histogram, this information is at your fingertips.
It's easy: The horizontal axis of the histogram graph shows the brightness of the tones in the photo. Its left part is responsible for the darkest shades, the right part is responsible for the lightest shades, and the central part is responsible for shades of medium brightness or as they are otherwise called halftones. The vertical axis displays how many pixels of this brightness are in the photo; the higher the peak on the graph, the more pixels
The most important thing to know about a histogram is that if the peak touches the right edge of the graph, then we have a problem with the photo. This is a large portion of your image that is blown out, or even completely white, without any detail in the highlights. And the biggest problem is that the area that is blown out contains no data at all, so you won't be able to do anything even in post-processing and even if you shot in RAW format. This only applies if the peak touches the edge of the graph. If it's a peak before the edge, everything is fine.
If the peak touches the left edge, it means that part of your image is completely black. You can use Exposure Compensation Plus to adjust your next shot. But if you are currently busy shooting at night, for example, the starry sky, then this is a completely “healthy” histogram for such a case.
There is no such thing as a perfect histogram. This is simply a graphical representation of the tonal range in your image. It's up to you, as the artist, to decide what to do with this information. Availability large quantity dark or light areas (provided there are no overexposures or underexposures) are not necessarily bad.
Let's look at some examples of what histograms will look like for different types of photos.
When you shoot in high key, the photo will have a lot of highlights and few mid and dark tones. When you want to photograph a scene in high key, your histogram should be shifted to the right - but so that the peak of the graph does not touch the right edge. If you wanted to take a high key photo, but your histogram shows a lot of tones in the middle of the graph, your highlights in the photo will probably look more gray than you'd like.
Pelicans in the Salton Sea, California

High key scene

The histogram for the image above shows the dominance of light tones
A low key scene is the dark scene you get when taking photos at night. In this case, your histogram plot will be shifted to the left. You may also have a peak near the left edge, which indicates the presence of the darkest areas

Such a scene will have a graph shifted to the left side.

The histogram for the photo above shows a dark scene.
A high-contrast scene is one where there are a lot of very dark and very bright tones, and perhaps not many mid-tones. In this case, your histogram will have rises on the left and right, and in the middle there will be either a dip or a flat graph.

High contrast scene. Extreme lights and extreme darks and very few midtones.

The histogram of the high-contrast scene is above.
A low-contrast scene (tonally) has midtones, and quite a few highlights. The histogram of such a photo will have a bell shape. Please note that this is a low-contrast scene in tonal terms, and high-contrast in color terms.


Again, it's up to you as the artist to decide what to do with this information, whether to use it or not. It's just another tool in your arsenal to help you turn your artistic vision into great photos.
If you are not happy with the histogram of the photo, then use exposure compensation. With it, you can adjust the exposure, making the image darker or lighter. Or you can affect the lighting of a scene in another way, using flash, a reflector, or a diffuser. The choice is yours.
You may have noticed in the examples above that the histogram not only shows brightness in grayscale, but also shows colors. Yes, you can overexpose or underexpose a color! It happens that there is some color that comes out very bright in a photo, and sometimes that color can be so saturated that you lose detail in it. This usually happens with red flowers, for example.


How to deal with this? The easiest way is to slightly desaturate this particular color in post-processing to bring back some of the detail in the flower's petals. The histogram above shows the increase in red tones in the highlight zone.
While you're shooting, you can use the histogram in combination with Live View (if you're using a DSLR) to see it before you take the photo (or just turn on the histogram on the LCD screen if you have a mirrorless camera). You can also view the histogram after you've taken the photo. In any case, it is important that you use the histogram to ensure that your exposure is correct while you are out in the field shooting. This way, you will have the opportunity to retake the shot while you are at the desired location.
Don't rely solely on visual inspection of the photograph taken on the camera's LCD screen, to evaluate the correctness of the exposure, turn on the histogram. This is because the brightness of your LCD has nothing to do with the brightness of your photo.
The histogram is also available to you during subsequent photo processing in any graphics editor. Use it to see what settings you need to adjust to avoid ending up with too bright or too dark areas in your photo during processing.
I hope this gives you a better idea of how to use this handy tool. If you have questions about the histogram, write them in the comments.


In general terms, profit is understood as the difference between the funds received from sales and the costs of the enterprise...

Which, throughout the entire production process, transfer their cost in parts to the manufactured products. So...
Theory This property was first noted by Kenneth Arrow in a 1963 paper entitled “Uncertainty and...

In connection with legislative changes, entrepreneurs are increasingly turning their attention to how they differ and how...
Wages in the public sector in one way or another affect the amount of earnings in commercial organizations. Therefore...
Summer is the time for vacations and trips. And going on the road today, almost everyone strives to capture their impressions...

You can get comfortable not only in a SV carriage or a compartment, but also in a reserved seat or a general one. For a comfortable...
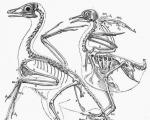
Birds are man's feathered friends. Their role in nature is invaluable. Read about them and their protection in the article. Birds: general...

The interview is in full swing, and you have already managed to talk about your education, achievements and explain why you wanted...

Each person of the nearly seven billion people living on our planet today is completely unique. This...

Hello! Today we’ll talk about branches and representative offices of legal entities. Development of any business...

There are a great many books in the world. And you probably have a lot of different fairy tales, stories, collections at home...

Success is a lousy teacher. He makes smart people think they can't lose. - Bill Gates...

History of building: Lathes were invented and used in ancient times. They were very...

Which, throughout the entire production process, transfer their cost in parts to the product being manufactured...
Theory This property was first noted by Kenneth Arrow in a 1963 paper entitled "Uncertainty...